
To get the most out of your Google Analytics data it is vital to make sure you have setup your Google Analytics views correctly. Getting the setup right means that you are seeing the most accurate data possible and that you do not lose data if something goes wrong.
In this post we will show you how to setup the two most important views. These are the raw view and a filtered view that excludes your internal traffic and any spam.
The Raw View
The raw view is simply a Google Analytics view without any filters or spam removal. This is the starting view that is provided when setting up your Google Analytics account. This view should be renamed to “Raw” and it should never have any filters or spam removal applied to it. Having a view that never has filtering added ensures that you never lose data because of a mistake in a filter.
The Filtered View
The filtered view ensures that you are seeing the most accurate data possible. In order to do this, you need to filter out two kinds of traffic. Firstly, you need to remove the sessions from your company’s own employees otherwise known as internal traffic. Secondly, you need to remove any spam traffic. Both of these traffic types will skew your data.
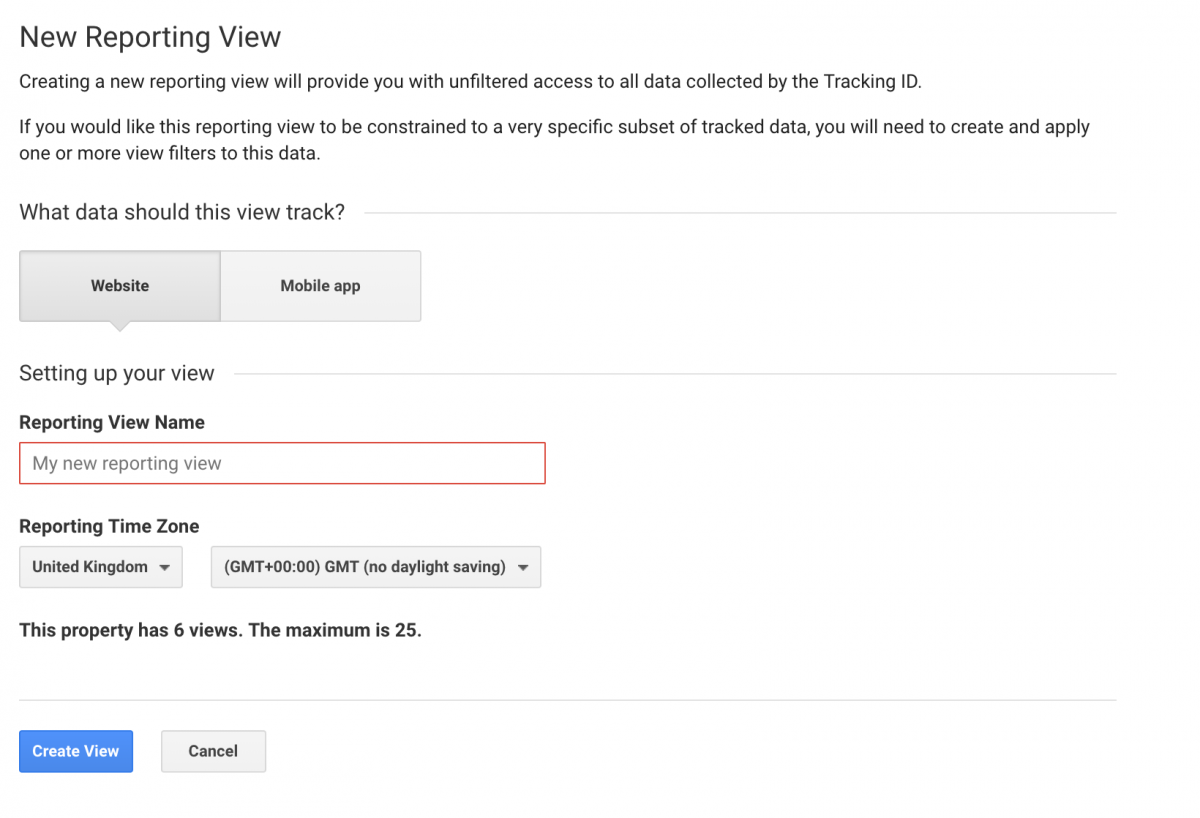
Creating the View
- Navigate to the admin section of your Google Analytics account.
- In the right hand column. Click the dropdown menu and Create new view.
- Name your view and select your location.
- Click Create View.
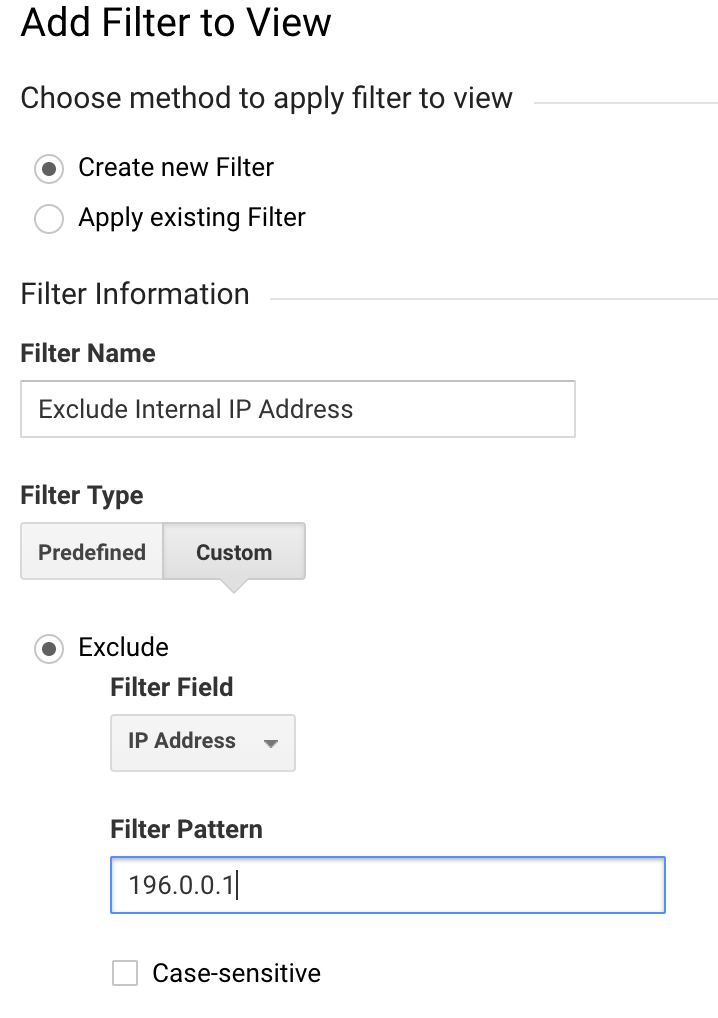
Removing Internal Traffic
The simplest way to remove your internal traffic is to setup a filter to remove traffic from your office’s IP address.
- Navigate to the Admin section of your Google Analytics account.
- In the view column – the right hand column – make sure your filtered view is selected from the dropdown menu.
- Click on the Filters menu option.
- Click on the +Add Filter button.
- Name your filter: Exclude Internal IP Address.
- Change the Filter Type to Custom.
- Ensure the radio button is set to Exclude.
- From the dropdown menu select IP Address.
- Input your office’s IP address.
- Click Save.
If your office has multiple IP addresses or IP address ranges, then these can be added into the filter using regular expressions.
You may have to anonymize IP addresses, because of legislation like the EU’s new General Data Protection Regulations. If so then, unfortunately, this will not work for you and you will need to find a different solution to exclude internal traffic. We will soon be publishing a blog post that will show you how to implement internal traffic filters with anonymized IP addresses.
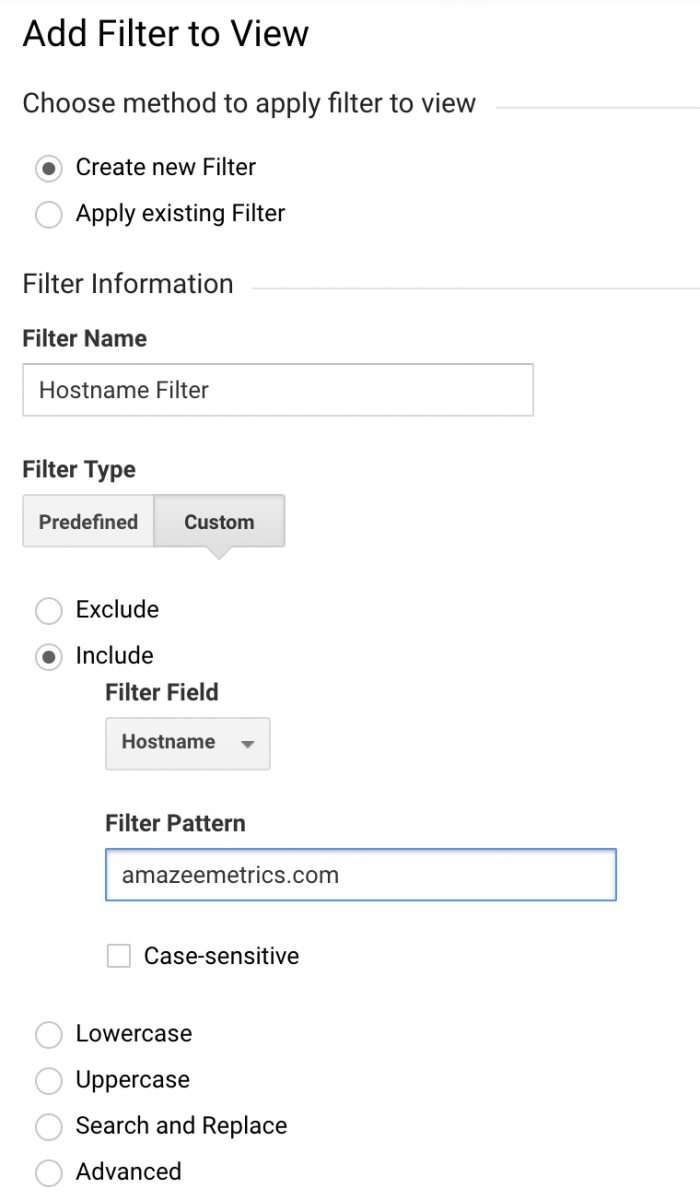
Excluding Spam Traffic
The first step in excluding spam traffic is to setup a hostname filter. This filters out any traffic caused by your Google Analytics ID being used on another site. To set this up you will need to add another filter in the same way as you did for the IP address filter.
- Navigate to the admin section and add a new filter to your filtered view.
- Name the filter: Hostname Filter.
- Change the Filter Type to Custom.
- Switch the radio button to Include.
- From the dropdown select Hostname.
- Input your hostname or domain. Ours, for example, is advance-metrics.com.
- Save the filter.
The second step is to ensure that you have Google’s built in bot and spider filtering turned on.
- Navigate to the admin section.
- Make sure your filtered view is selected in the right hand column dropdown.
- Click on View Settings.
- Check the Exclude all hits from known bots and spiders checkbox.

You now have your two most important views setup. If you have any questions about setting up these views then please send me an email.